
Jelly bracelets are all the rage at the moment and I love them but find the push connectors a pain to put on myself so I have devised a new way of making them. Adjustable braclets -one size fits all and I'm happy to share with you how I made them and where I got my supplies.

You will need the following:
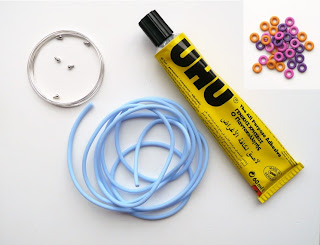
Bracelet memory wire (I used 60mm)
Memory wire cutters
3mm pvc tube
Tube ends
Glue (I used UHU)
Rubber rings (6mm OD/2.5mm ID Information supplied by Heather Kelly from Heather Kelly Glass)
A pair of scizzors
Tape Measure
Pliers
Ring nose pliers (I think that's what they're called)
Beads
I made some beads first. Of course you don't have to use lampwork beads but they need to have a minium hole diameter of 3mm. If you would like me to make some beads for your own bracelets please email me.
I made my beads using some 3.2mm mandrels I got from Julie Fountain at Lush Lampwork. I can't see them on her site but if you give her an email she might still have some.
I also like to make the 3 beads at the same time so that I can get the sizes in proportion.

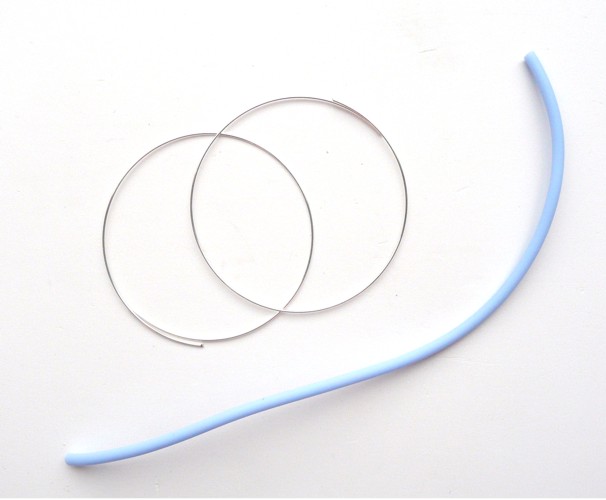
Cut 20cm of pvc tube and then 2 pieces of memory wire approx. 19cm long. I say approx. because it is a bit of a pain to measure. Also it will depend on the size of wrist that you are making the bracelet for. Mine is quite slim so you might want to increase the size for a bigger wrist. Also I haven't said where to get the memory wire from as lots of places stock this. Make sure you use dedicated memory wire cutters and not your jewellery cutters as they will get ruined.


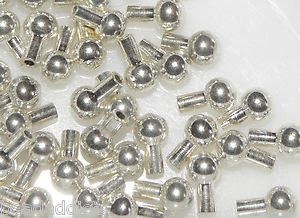
It took me ages to find these ends. You can get them on Ebay from Bead Addicts.Unfortunately these are not longer available from Bead Addicts, if anyone knows where I can get them from please email me.

Pick up the end in a pair of pliers and dab it in the glue. This is the fiddly part. It will either go in straight away or spin away from you. Just keep trying until you get it in. The reason I like using UHU for this is because you can wipe away the excess. (I haven't got a picture of this because I couldn't do it an hold the camera at the same time sorry)

There you have it. You can feed the beads on afterwards so you can make them in advance and then let people choose their own beads and make them up.
I like to use a couple of these little rubber o ring beads as stoppers so that the beads don't move.
 Again these came from Lush Lampwork. at £1.00 for 15 I think these are quite expensive but as I haven't found anywhere else that does them yet and I only use two I bought a mixed selection. Also available from http://www.etsy.com/shop/MyELEMENTS and http://shopbeadmeastory.com/
Here is the finished article. Looks good even if I do say so myself.

I hope you enjoyed this tutorial. If you find any other suppliers of tubing or o rings the same size I would be interested to hear from you.
Happy New Year to you all and thanks for looking.
Linda
x

Great tutorial, thanks for sharing!
ReplyDeleteGlad you like it June.
DeleteWhat a great tute! Thanks for sharing. There is a Canadian supplier of the rubber rings. Not sure how shipping would be for you, it was a bit too expensive for me.
ReplyDeletehttp://theringlord.com/cart/shopdisplayproducts.asp?id=80&cat=Rubber+Jump+Rings
Thanks Shirley, might be good for any Canadian readers (I wish)!
Deleteok, just found some cool tubing! check this out.
ReplyDeletehttp://www.anglersdreams-flyfishing.com/en/store/flytying/tube-fly/plastic-tube-3-mm.html
Glittery tubing, how cool is that. Thanks for sharing Shirley.
DeleteWhat a great tutorial...thank you!!
ReplyDeleteThis comment has been removed by a blog administrator.
ReplyDeleteSuch a interesting information and i really like to see this posts cheap rubber wristbands thanks for sharing it article
ReplyDeleteOh great idea you have to share on this blog i like it and i appreciate to you well nice blog thank you for sharing! rubber wristband
ReplyDeleteGreat tutorial. Thanks. Did you ever find a supplier of the tube ends please?
ReplyDelete