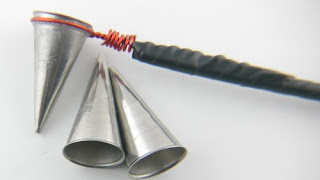
She used an enamel applicator like this one
I looked into buying one but they are not cheap and Astrid had to squash the hole smaller on hers to restrict the flow of enamel so I though I might have a go at making my own.
I visited my local cake decorating shop and bought a metal icing nozzle. For my first attempt I made a coil of wire and tried to use it to apply the enamel to the bead. It wasn't very successful as when I placed the nozzle on the glass it rose up out of the wire ring. I then just tried using a pair of tweezers to hold the nozzle. This did work but the hole on the nozzle was a little large and I have trouble controlling the flow of enamel.
This was my first bead attempt.
I finally came up with this
I would like to show you the next beads I made using it but they are a work in progress and something I wan't to keep to myself for the time being.


No comments:
Post a Comment